One of the most common questions in music production forums is how to get songs to be as loud as commercially produced music. Another, is how to get mixes to translate well to different systems, such as a home stereo system, a car, and a phone.
Here are 2 approaches to getting your music to the appropriate level and to sound good everywhere, without flattening it like a pancake, or making it sound brittle. But first, a little background . . .
Streaming Services & LUFS
Streaming services don’t want your recording to clip (go beyond 0dB peak). And Spotify adjusts ‘albums’ to -14 dB LUFS, if they can. LUFS is a way of measuring perceived loudness. That just means they turn an album up or down until it averages -14 dB LUFS. In other words, all the songs on Spotify, should sound about the same. But they don’t.
Should you care that Spotify ‘normalizes’ to -14 dB LUFS? Should you try to master your tracks to -14? What about other streaming services, CDs, radio, or YouTube?
The answer to these questions is a definitive “sort of”. Basically, what you’re looking for is a balanced mix, frequency-wise, and a controlled dynamic range. Only after that should you be concerned with level. Let’s talk about dynamic range, first.
Dynamic Range And Why It’s Important
Dynamic range is the difference between the loudest and quietest parts of your recording.
Too little dynamic range will take away from the song’s impact, because some of the emotional impact of a recording comes from the rise and fall of volume. Too much dynamic range and you won’t be able to hear the quiet parts without being too loud in the loud parts.
How loud a song sounds overall is largely dependent on the average level.
Too much dynamic range will make it difficult to get the average level of your song high enough.
Why?
Imagine you have a basketball team’s starting five, and you want them to make half their shots. But you’ve got three players who only make 3% of their shots. There’s no way you’re going to get up 50% because you’ve got three players tanking the average.
The difference between the low percentage shooting, and the high percentage shooting is too great. The range between the good and bad shooters is too much.
The same thing might be happening to your song.
If the quiet parts are too quiet, you won’t be able to keep your average level up without squashing the crap out of your mix.
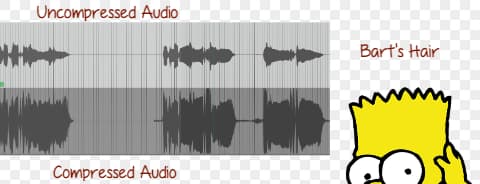
The not-so-secret solution is to turn the louder parts down compared to the quieter parts, so there’s less dynamic range. But you don’t want to reduce the volume variance so much that you take the oomph out.
What is a tool that reduces dynamic range? Compression.
Or they say, "I normalized to -14lufs, just like Spotify wants me to, but now I've got a lot of clipping. What am I doing wrong?"
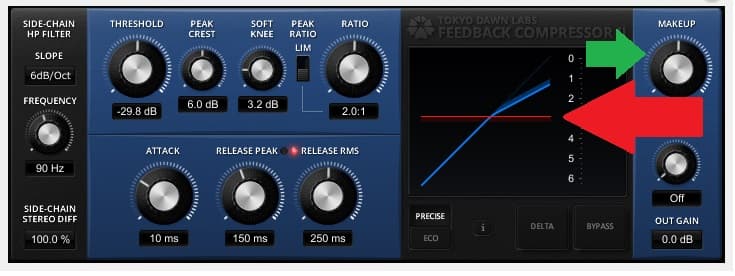
Compressors generally turn the loudest peaks of a recording down. Then you can turn the whole thing up a bit and not clip. The end result is that the loud parts aren't any louder, but the quieter parts have come up in volume.
But it's not as simple as throwing a limiter (a form of compression) on your master. In general it's better to compress small amounts, in stages.
In other words, you might have six guitar tracks. You compress each of those six tracks a little bit. Then you have a bus that includes all the guitars. You compress the bus a little bit, too. Maybe that feeds into a fader that has all your music tracks except vocals. You compress that a bit, too.
And you do the same to your other buses and tracks. Now, since you're brought your low level signals up, you'll be able to get your average level higher.
When you get to the mixdown phase, you've already got a dynamic range that's under control. You'll still probably want to compress the overall mix a bit.
Then, last in your signal chain will be a limiter. A limiter is an extreme compressor. It stops any signal level higher than the threshold. So, if you set the threshold to -1dB, your mix won't clip the output.
Tada!
That's an overview of how to use compression. What else can we do to make our mixes more pro sounding?
Using A High-Pass Filter To Recover Lost Power
Most of us working in bedrooms and living rooms, have less-than-ideal listening conditions. If we're monitoring on small speakers, or in an acoustically untreated room, we may not be able to properly hear low end.
Here's the rub.
How Out-Of-Control Low Frequencies Can Ruin Your Mix
Low frequencies take a lot of energy to produce. Low end moves speaker cones further. Bass frequencies require more of any power amps that power your speakers, too. In other words, low frequencies take a lot of your power and what we call headroom.
But you like a good thumping kick drum, right? Sure you do. But if there's a rumble in your vocal, or excessive low end in your keyboard track, it will take away from the low end you want. It will compete with the kick drum.
Then you'll have to turn your kick up. And then your bass. Pretty soon, much of the power in your system will be used up trying to produce low end.
And frequencies lower than your lowest instruments will be even worse. Your speakers will try to reproduce 20Hz, but they most likely can't. So you can't hear this low mess that's sucking the power out. And when you upload the track to Spotify, you don't have any idea why it doesn't sound as loud as other tracks.
Well, it is as loud, but just not with stuff you can hear.
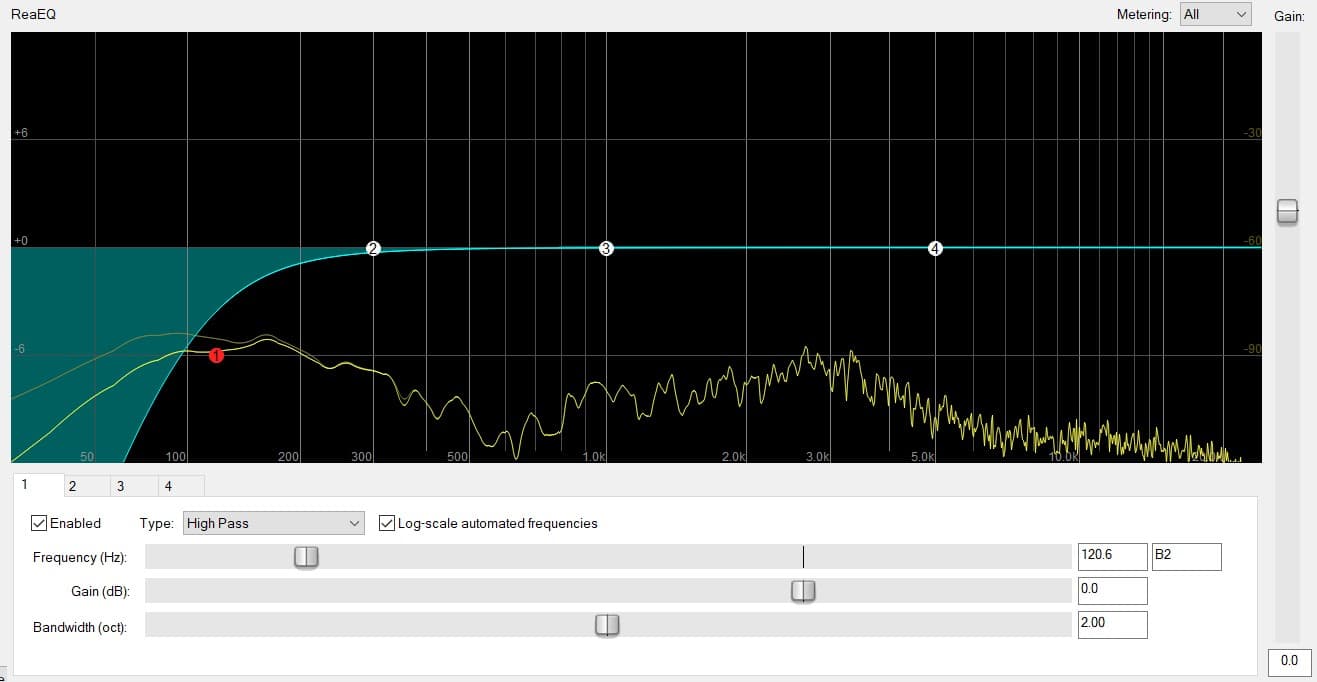
One solution is to use a high-pass filter.
A high-pass filter is an EQ that, well, lets high frequencies pass through. In other words, it cuts low frequencies. It's also sometimes called a low-cut filter 🙂
Frequencies below about 20Hz aren't audible much. Most of the usable low end will drop off around 30-40Hz (depending a bit on the genre). The lowest note on a standard guitar, tuned to standard pitch, is 82.4Hz (it may have subharmonics below that). Vocals might not contain anything useful below 70-180Hz (depending on the singer and the material). I can't give you absolute numbers as it will vary by situation. You'll just have to use your ears and a frequency analyzer. Good quality headphones can give you a leg up, as well.
Where you find rumble and mud, reduce it.
Tips For Using High-Pass Filters
- Use a frequency analyzer to see what you're doing. Compare your music to professionally produced recordings, when you can.
- Put a high-pass filter on your vocals and raise the cutoff frequency until you hear the vocal start to lose warmth, and get thin. Then lower the roll-off frequency until the voice sounds warmer again.
- High-pass a guitar and raise the cutoff frequency until the sound starts to lose its body and heft. Now back that cutoff frequency down a bit.
- You can even high-pass low frequency instruments such as bass guitar and kick drum. Just have the filter set to start at 25-40Hz, and take out frequencies lower than that.
- Use headphones that have a good low frequency response to judge low end. Good headphones are a lot cheaper than good speakers, and they take the room out of the equation.
Whether you can hear it or not, you've just taken out low end that's sucking the power out of your mix. Now you'll be able to get the average level of your mix to be higher.
How Much Reduction Is Too Much?
Keep in mind that, if you're listening to isolated frequencies down low, it might sound muddy. Those frequencies in the right proportion might add warmth and heft to a sound. We're not trying to eliminate the low end of a vocal or keyboard. We want to get it balanced.
If you find your mixes starting to sound brittle, thin, or harsh, you might have high-passed too much 🙂
There are a few ways to deal with this.
- Lower the high-pass frequency.
- Use a gentler slope on your high-pass filter.
- Use a low shelf, rather than a high-pass filter.
- Don't high-pass.
- Better control your recording environment for rumble and other low-frequency garbage.
Let's go over those in more detail.
- You can change the frequency at which your filter takes effect. Maybe you can lower it from 120Hz, to 80Hz.
- High-pass filters have slopes which are measured in dB/octave, in 6dB increments. A filter set at 12dB/octave drops of 12dB for every octave lower than the cutoff frequency. In other words, if you're cutting 12dB at 80Hz, you'll cut 24dB at 40Hz. If you are using a filter with a choice, you can set it for a gentler slope, such as 6dB/octave.
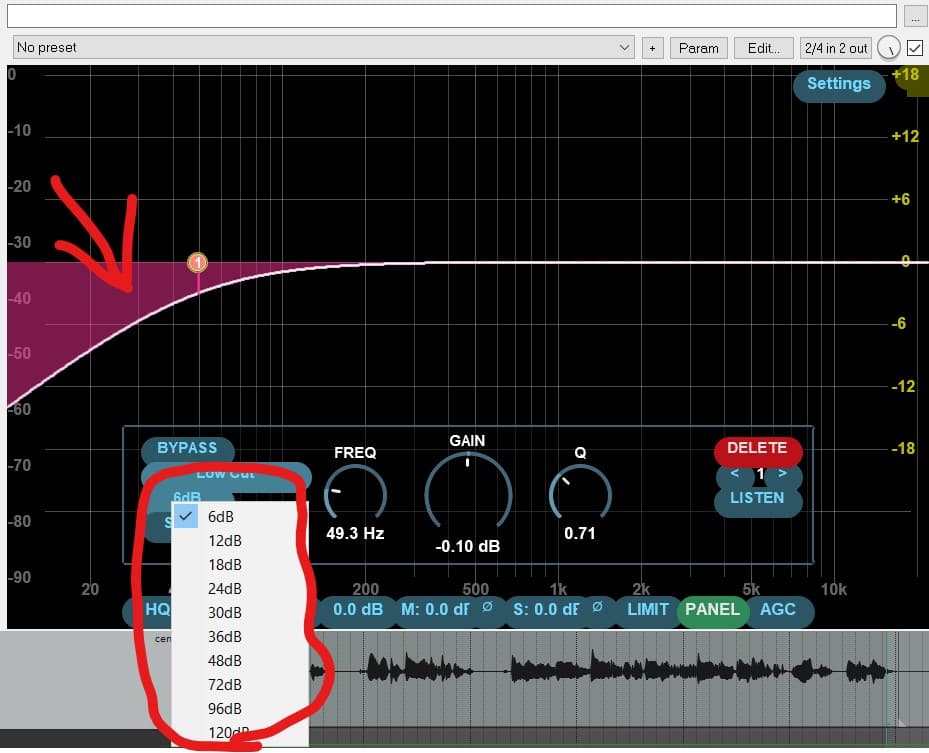
JS ReEQ With High-Pass Filter With A Selectable Slope
- You can use a different type of EQ, a low-shelf. Instead of sloping downward, a shelf lowers (or raises) frequencies by a set amount.
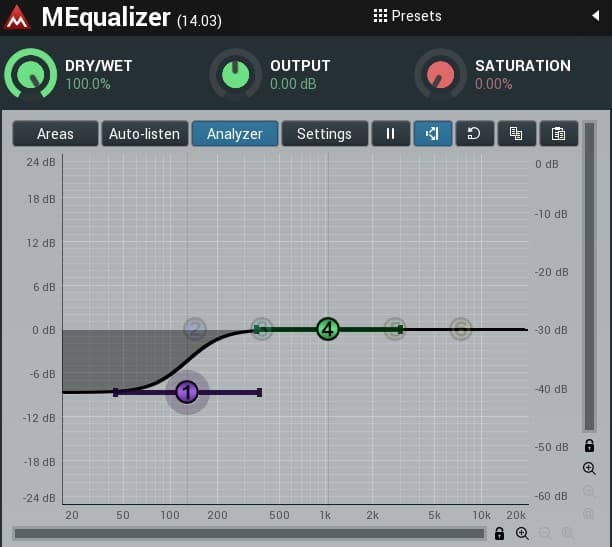
MEqualizer With Low Shelf, From Melda Productions
- Plenty of great sounding recordings don't use high-pass filters all over the place. If your mix is sounding thin, experiment with removing some of the low cuts you've got going on. Keep in mind that ideas about high-pass filtering and dynamic range are guidelines -- not rules.
- Us bedroom producers and home-recording enthusiasts can't always perfectly control our recording environment. But if you notice consistent rumble in a mic, see if a shock-mount will reduce it. Or maybe a rubber mat underneath the mic stand. I lived in a building in which the HVAC system rumbled until about 8P.M. every night. It was just a little rumble on the recordings, but it was better to record mics after 8. Unplug your fridge and turn off your AC! Then you can use less high-pass.
Two Ways To Get The Average Level Of Your Recordings Up, And Get Them Sounding Good
So, that's two ways to get the average level of your songs up and make sure they sound good on different sound systems and platforms, so they can sit next to the latest hits without sounding wimpy.
- Compress (Compress a little bit, in stages. Limit at the end of your signal chain.)
- High-pass to take unnecessary low end out of your recording.
What about Spotify, YouTube, and LUFS?
Spotify's process for evening out the perceived volume of tracks seems to be non-destructive. In other words, if your mix is below -14dB LUFS, they'll turn it up. If it's above -14, they'll turn it down. But they won't compress it additionally, or change anything else about the mix.
The problem comes if your dynamic range is out of control. If you render a mix from your DAW, at -14dB LUFS, and you get clipping (some signals with a higher level than 0dB peak), Spotify may turn it down more, in order to get your peak levels within the parameters.
So, there are really a couple of things to consider. 0dB peak, and -14dB LUFS.
If you render a mix to -14dB LUFS and you get red lines, you'll need to tighten up the dynamic range in order to compete on Spotify. That typically means clamping down a bit on your limiter, or going back to your mix and increasing the compression.
But basically, you can create a mix at any reasonable LUFS level, and Spotify will deal with it, as long they can change the level to -14dB LUFS without any clipping.
Send them a well-balanced mix with controlled dynamics at -11dB LUFS, and they'll turn it down a bit. But no harm done. It will sound about as loud as all the other songs. Send them a good mix at -17dB LUFS, and they'll turn it up. Again, no harm.
But send them a mix at -17dB LUFS with peaks to 0dB peak, and you're SOL. They can't turn it up because the loudest parts are already as loud as they can handle. In other words, control your dynamic range a little bit.
Are The Loudness Wars Over?
Yes-ish. The reason a lot of services are using LUFS is that it's a measure of perceived loudness instead of absolute peak measurement. In the past, some mixing and mastering engineers were compressing and limiting the living daylights out of their mixes, in order to sound a little bit louder than the next song. Why? Louder tends to sound a little better to our ears.
It became kind of a competition, to see who could jam the most loudness into a track, without distortion.
So, instead of only using peak levels, some services went to perceived level, such as LUFS. That way, it would turn down the loud sounding, overly-compressed mixes. In that sense, the loudness wars are over.
So, What Should I Do About LUFS, Limiting, & Compression?
- Use a dynamic range meter on your favorite mixes, and see where the ballpark is for your genre and tempo.
- Get your mix in the same ballpark, using compression and limiting.
- Set the peak output of your limiter to about -1dB.
- Check your mix on a LUFS meter. Higher than -14dB won't give you an advantage on Spotify (for example), but it won't hurt, either. Much below -14dB LUFS, and if your mix is hitting the limiter at all, Spotify will not be able to turn it up. Go back and tighten it up. If your mix isn't hitting the limiter, turn it up into the limiter.
- Sleep well. You're doing all right!
Keep in mind that it's not about getting the last 0.5dB out of a mix. It's not about hitting the exact numbers of your favorite mix. The priority is to get your mix to sound good and translate well across various platforms. It has to sound good on a big speaker system, and a phone.
The reason we use pro, reference mixes for comparison, is because we know they translate well. If you approximate their numbers, you have a better chance of sounding good everywhere.
Resources
Voxengo Span: Voxengo Span is a free, useful frequency analyzer. Windows & Mac.
TDR VOS SlickEQ: is a high-quality EQ which can be used for mixing/mastering, or on individual channels. It's free. Windows & Mac.
Rea (Reaper) Plugins: ReaEQ, ReaComp, ReaXcomp, ReaDelay, ReaFIR and others come with Reaper. If you don't have Reaper, you can download the VST versions of ReaEQ, and these other useful plugins here. If you want to follow along with my tutorials, it will be good to have these. VST/VST3 versions available for separate download (Windows & Mac).
TT Dynamic Range Meter: Gives you an easy-to-read indication of the dynamic range of your material. 32 bit only.
Melda MFreeFX Bundle: Includes MLoudnessAnalyzer and 36 other free effects, analyzers and tools. (Windows & Mac versions available)
Loudmax: Loudmax is a transparent limiter that works very well. Available in VST3 (for PC), and AU (for Mac).
Enjoy, Keith
