Vocal Thickening
Double-tracking is a great way to thicken up vocals when you're recording. But we can achieve something similar without doubling vocals. Let's think or a second about what double-tracking brings to the table. Two voices singing the same thing . . .
We can do something similar with plugins. We can also get a bit of stereo spread, or width in the sound.
Vocal Thickening Video Demo
Vocal Thickening Technique
Take a center-panned vocal and add . . .
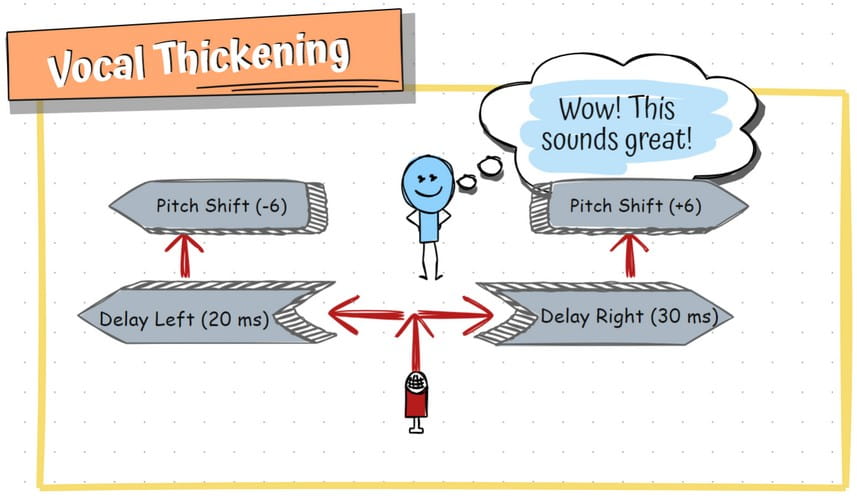
Reaper Vocal Thickening Technique
That's the gist of the vocal thickening technique. Let's explore how to do it in Reaper,(a great DAW for independent musicians) using free, Reaper-specific plugins. You can download the vocal thickening FX chain I use, at the bottom of this page, in the 'Resources' section.
Note: This tutorial depends on you having ReaPack installed and updated (it's free), and certain repositories installed. Installation instructions are below, in the 'Resources' section.
Step 1 - Add An Empty Channel, And Route Your Vocal To It
'Ctrl' + 't' will get you a new channel/track in Reaper (Windows). 'Cmd + 't' on a Mac. Left-click and drag from the route button on the vocal channel, to the route button on the new channel and label it 'Vocal Thickening'.
Step 2 - Add JS Channel Delayer to the Vocal Thickening Channel
Click on the FX button on the Vocal Thickening track and search for JS Channel Delayer, and click 'Add'. Set the left side for a 20 ms delay, and the right side for a 30 ms delay.

JS Channel Time Delayer with a 20 ms delay to the left, and 30 ms to the right
Step 3 - Add ReaPitch
Again, click on the FX button and look for ReaPitch, and add it. Use two shifters -- one +6 cents and panned to one side. Another, -6 and panned to the other side. Some people like to add more. You can go plus/minus 3, 9, and 12 cents, also. Alternate the plus/minus panning so that you're not all sharp on one side and flat on the other.
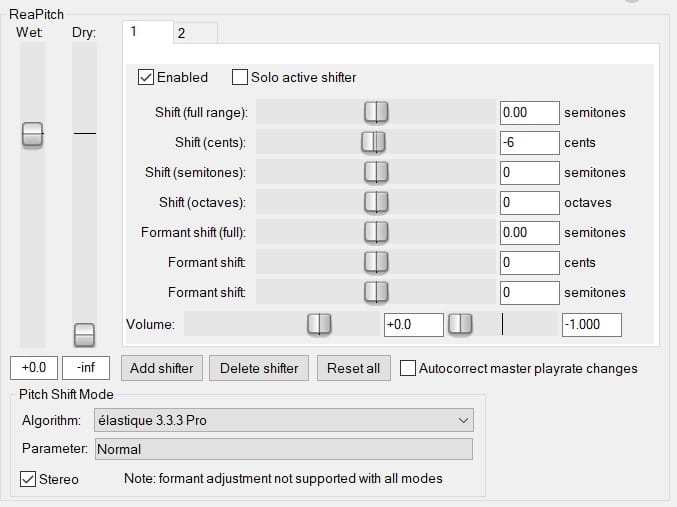
ReaPitch
Step 4 (Optional) - Add Ripple Phaser
Again, click on the FX button and look for Ripple Phaser by Geraint Luff. Add it, set the 'Stereo' knob all the way to stereo. Adjust the controls to taste, and use the 'Mix' knob to dial it back.
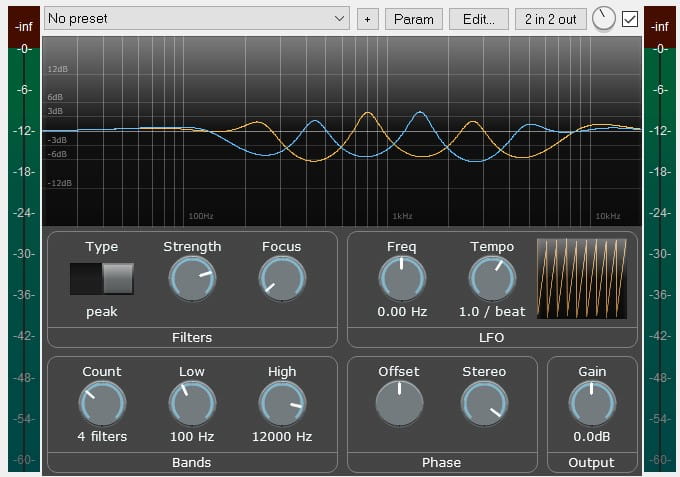
Geraint Luff's Ripple Phaser
I also like to add Tukan's VariBus to the end of the chain to level out the signal, and give me some saturation/distortion, and the Green Dynamic EQ at the beginning of the chain for de-essing.

Tukan VariBus Compressor
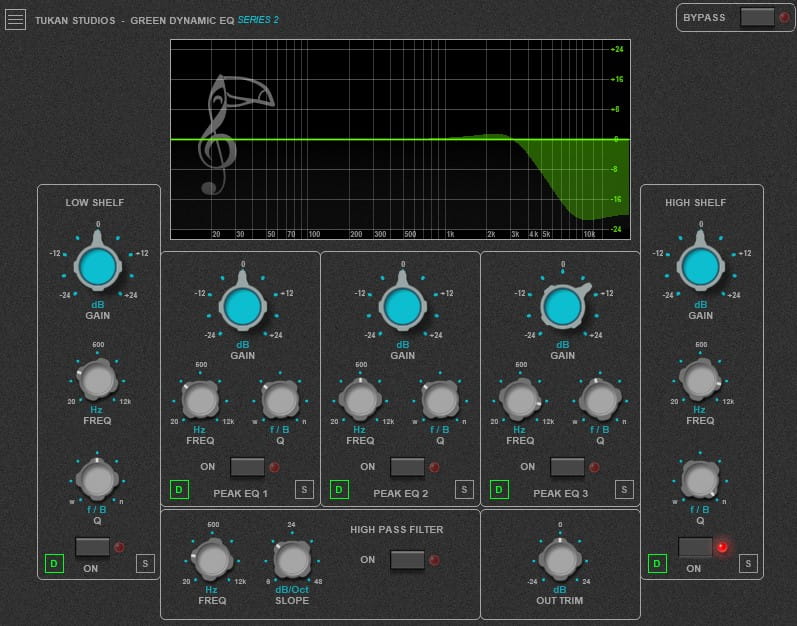
Tukan's Green Dynamic EQ
Resources
Installing ReaPack & Importing Repositories
Reaper uses something called ReaPack to manage scripts and JS plugins developed by various folks. It's the easiest way to install Tukan and other plugins.
Let's install ReaPack and a couple of what's called 'repositories'. It's pretty easy.
Installing ReaPack
Follow these steps to install ReaPack:
- Download the correct ReaPack version for your operating system.
- From REAPER: Options > Show REAPER resource path in explorer/finder
- Put the downloaded file in the UserPlugins subdirectory within that directory
- Restart REAPER.
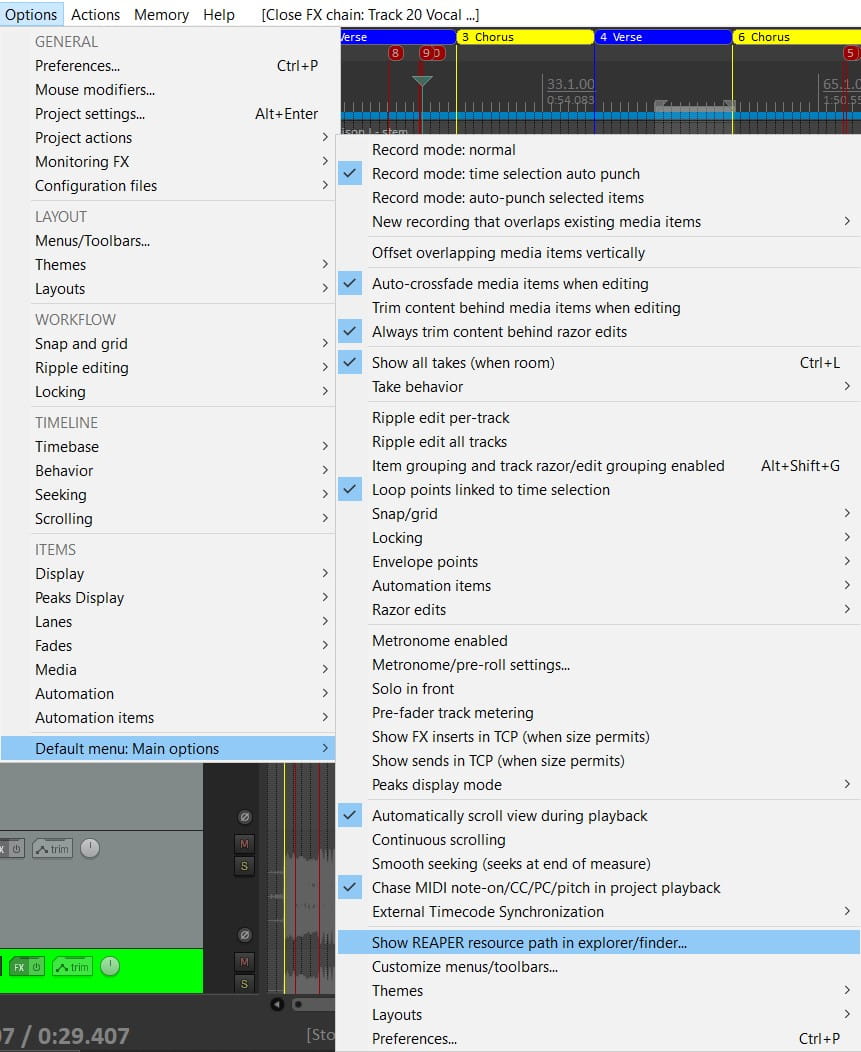
Show Reaper Resource Path
Importing Repositories
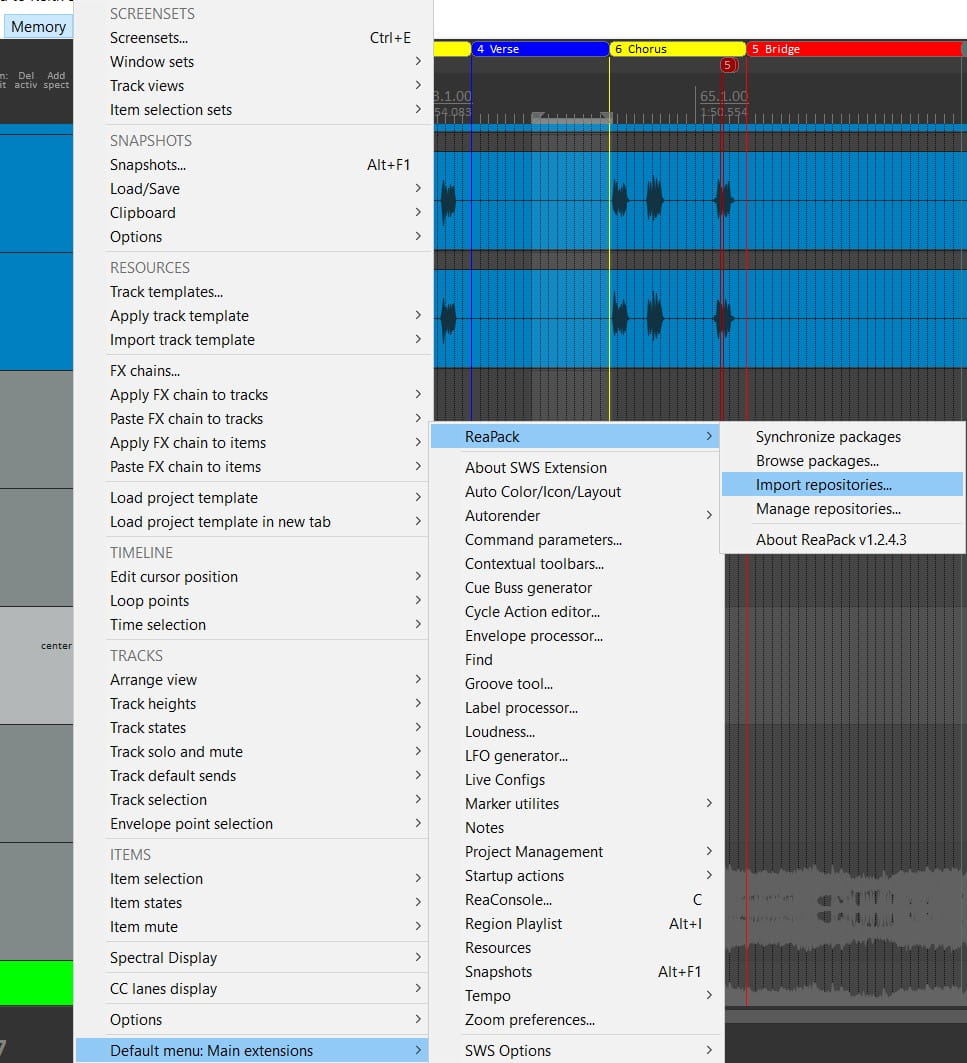
Import Repositories Menu
Go to the 'Import Repositories' menu and paste in the following URLs and click 'OK'
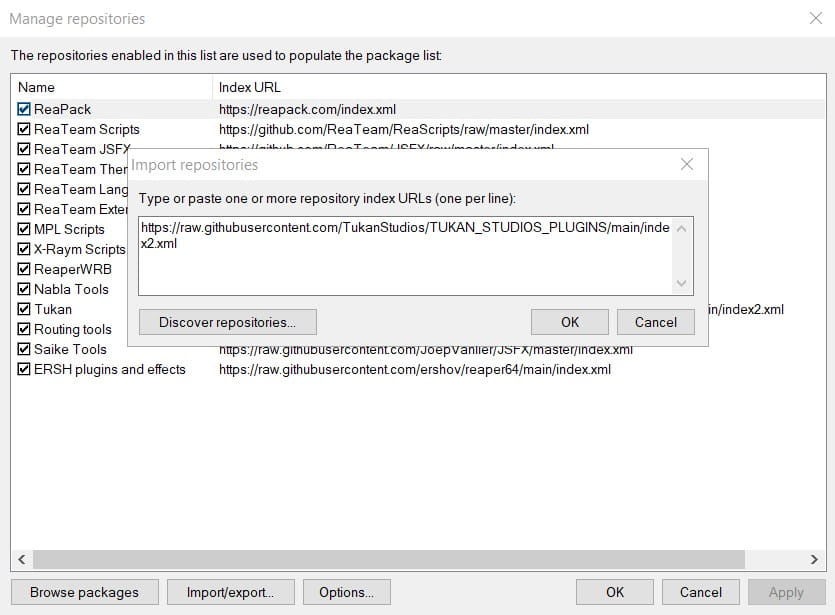
Import Repositories
Tukan Studios
https://raw.githubusercontent.com/TukanStudios/TUKAN_STUDIOS_PLUGINS/main/index2.xml
Geraint Luff
https://geraintluff.github.io/jsfx/index.xml
My FX Chain Download
Here's the link for the FX chain used on the video. It's JS Green Dynamic EQ, JS Channel Time Delayer, VST ReaPitch, JS Ripple Phaser, JS VariBus Compressor.
In order to use this FX chain drop the Vocal Thickening.RfxChain file in your FX chain folder. It's in your REAPERFXChains folder. You can locate it by opening up and FX window, click on 'FX' and then 'Save FX Chain'.
Enjoy
Keith

