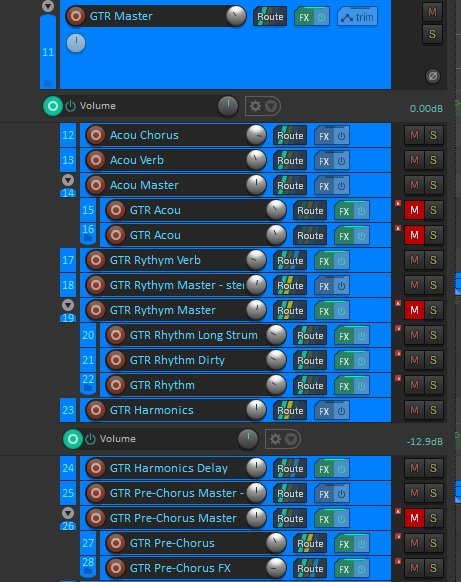
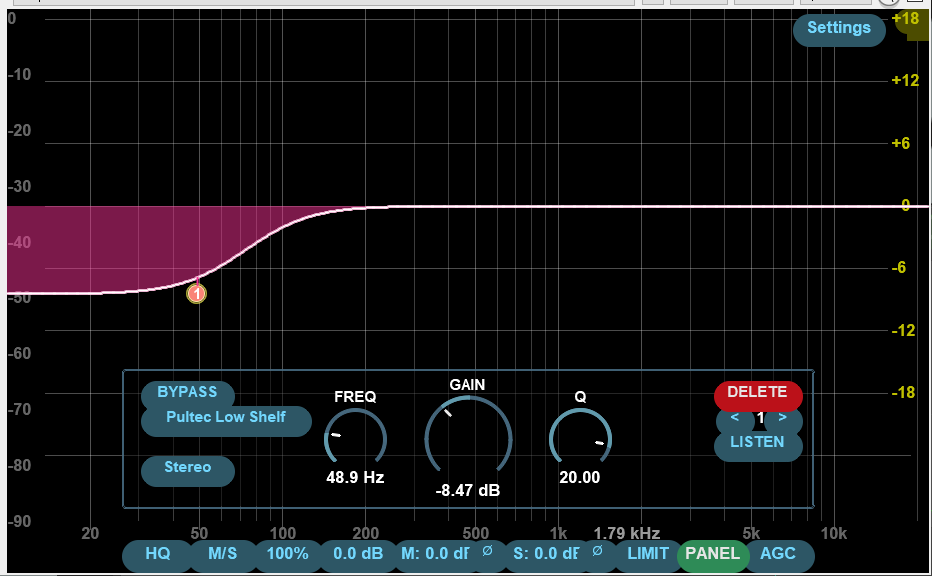
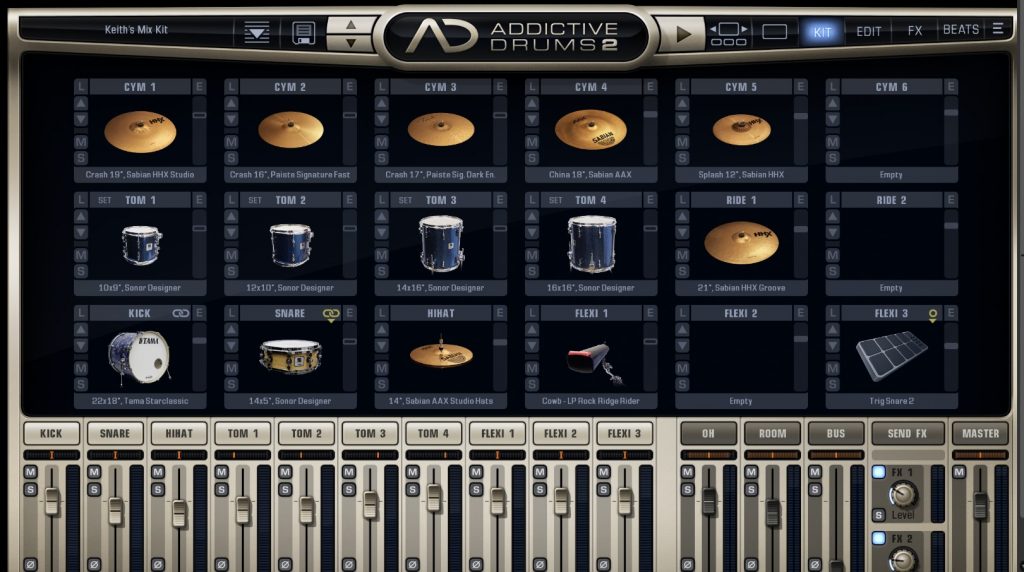
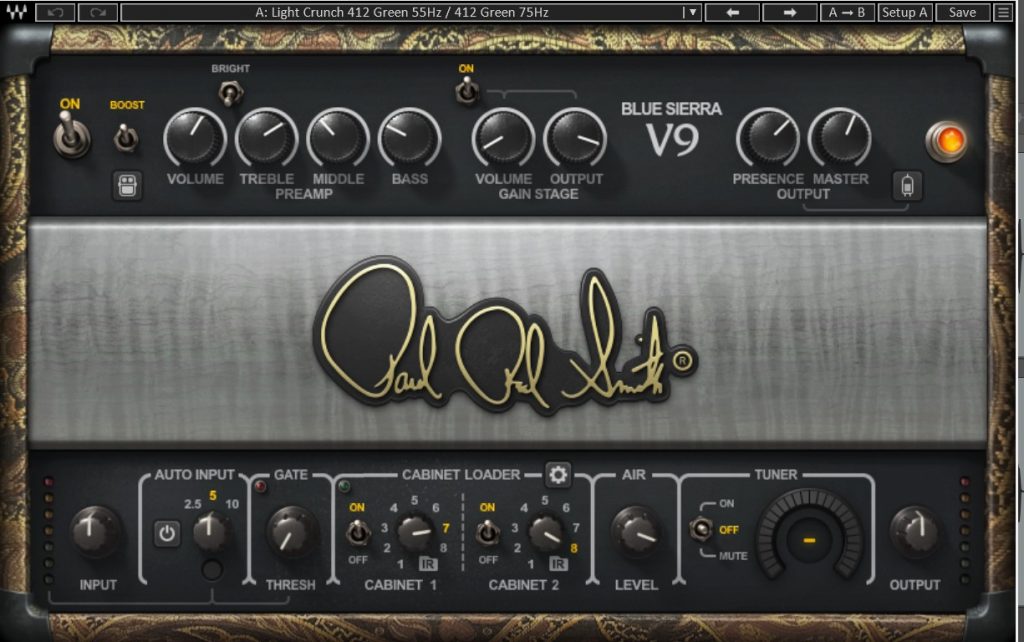
How To Get Your FREE, Pre-mixed Rhythm Section, For REAPERDownload and install SSD5.Download and ...
Home Studio Recording & Production For Independent Musicians
You write and perform songs. You want to record them, but you don't have a big studio equipment budget. Recording and producing music in your home recording studio may be the answer. Let's get into it.
What Is A Bedroom Producer & What Does It Take?
A music producer is traditionally the person responsible for the artistic vision of a recording. It's much like the role a director plays for a movie production.
A bedroom producer is someone who produces music in a non-traditional, usually small recording environment. It's often a bedroom, living room, or basement.
Sometimes it's a hotel room, or a rented house. Often, the recording and mixing are done with a laptop, a few pieces of software, and a couple of microphones.
The Phases Of A Recording Project
The musical aspects of recording may go through the following phases . . .
- Songwriting
- Pre-production and arrangement
- Recording
- Overdubs
- Mixing
- Mastering
A bedroom producer might be involved in any, or all of these phases. If you want to record your own music, band, or duo, you take on the role of a bedroom producer (although you might outsource any of these musical phases).
Let's explore what happens after the songs are written.
Pre-Production And Arrangement
In an old-style recording session with a major label, a producer would very likely be involved. A producer is responsible for the artistic vision of the recording. They are the interface between the musicians/songwriters, the technical people (recording engineers), and sometimes the label.
In a home studio situation, you'll probably be doing this yourself. You are the songwriter and the musician. You are the audio engineer. You are the producer, and the record label.
A producer might have pre-production meetings with the musicians, in which they think about the arrangements of the song, tighten up any loose ends, and perhaps discuss or add breakdowns, key changes, additional instruments, or other enhancements to make the songs more exciting or emotionally impactful.
Recording
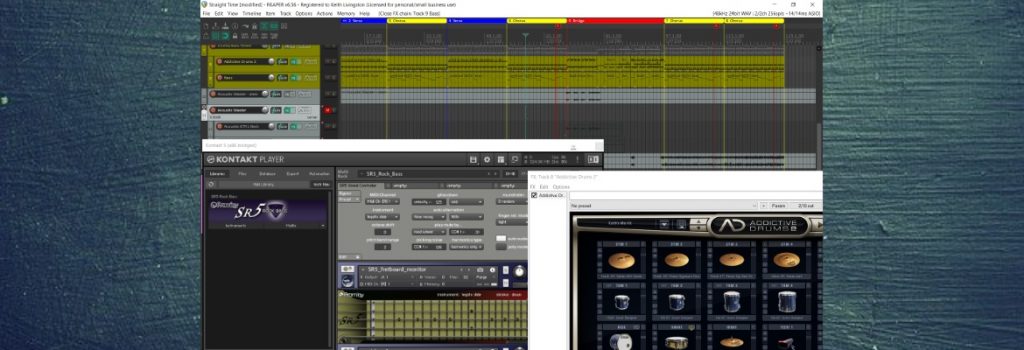
This is the phase in which you start tracking instruments. You might record everybody at once, or do one at a time. If you're a singer/songwriter recording yourself, you might start out by programming a drum machine or playing to a click track.
Overdubs
Overdubbing is the process of adding additional recorded tracks, once you've started recording. In my solo work, I generally end up with between 20 and 80 recorded tracks. There are background vocals, percussion, doubling of guitars, keyboards and more.
Mixing
Mixing is blending the recorded tracks into an (almost) finished song. You might add effects, pan instruments left or right, use processing such as compressors and turn volumes up and down to move the song forward and create emotions.
Mastering
Mastering is putting the finishing touches on a recording project. If mastering a single song, you make sure the song level hits the technical specifications required by various formats such as streaming platforms and CD manufactures. In a complete mastering session, you would also add meta data (data about the song that is included, but is not part of the audio signal).
Meta data might include the song title, the artist, and codes identifying the composition and recording.
Mastering a multi-song project would include the above, plus making sure the songs sound coherent as a project. You would match levels and EQ between songs, and set the gaps between songs, as well.
You might then export the project in various formats to be used by streaming platforms and CD or vinyl manufacturers.
These Processes Are Not Discreet
Although I presented these as phases of producing music at home they don't necessarily occur in discreet sections, in order. For instance, I often mix a bit and add processing as I'm overdubbing.
I might start final mixdown and discover I need a new guitar part -- so I go back and do it. I might make arrangement changes in the middle of overdubbing.
But in general, the process flows through these phases.
Home Recording Studio: So You Want To Record Your Music?
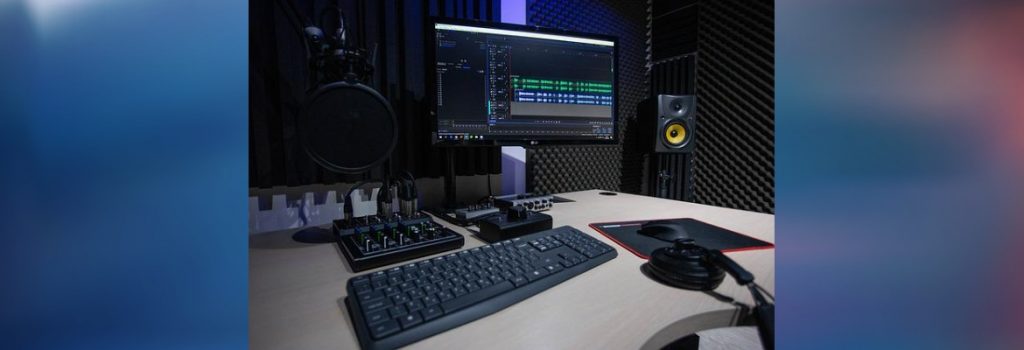
Let's cover what goes into putting together a small recording studio in your home, apartment, garage, shed, or outhouse, what gear and software you'll need, and what's involved in recording, arranging, mixing and mastering music -- a bird's-eye view.
Home Studio Gear -- Minimum Viable Studio
Here's the good news. You probably already have a lot of what you need in order to get started making recordings at home. You might have a computer, a decent chair, some musical instruments, and maybe even a microphone or two. Let's see what might work, and what else you need, to get your songs recorded.
Music Production Computer
Although you can buy a dedicated hardware DAW (digital audio workstation), most people use their existing desktop computer or their laptop. If you already have a laptop or desktop -- PC, Mac, or Linux, it will probably be sufficient. Chips: Intel, M1, M2, Ryzen -- whatever you have will likely be fine. Apple iMac, Intel core? It'll work. Linux? The availability of plugins will be limited, but the list is growing. Many music recording suites are cross platform. Logic Pro, and GarageBand are Mac only.
There are some differences in the chipsets, but it's not particularly important if you're starting out.
While it's a good idea to have a separate computer dedicated to audio, lots of us use whatever computer we already have. My music computer is also my work computer, my email, my video editing computer, and my word processor.
I run my bedroom studio (it's actually in my living room), on a 10 year-old HP laptop. You'll need a good amount of RAM and the faster your hard rives are, the better. What computer you need largely depends on what your recording requirements are.
Just recording acoustic instruments into a computer is not very resource intensive. But if you're going to include lots of virtual instruments such as orchestras, drums, bass, big sample libraries and dozens of tracks, you'll need more.
Depending on what you're doing, a video card with a dedicated processor can help take the load off your main CPU.
Here are some specs I recommend for various recording scenarios.
Bare Bones, Mid-Level, & Heavy Use
I'm going to divide my recommendations into three main categories -- Bare Bones, Mid-Level, and Heavy Use. Your gear recommendations will depend on which category you fall into. Check them out, and decide where you fall, and click on the appropriate tab for your situation.
Bare Bones
Recording yourself and your acoustic guitar? Are you a folk duo with banjo, accordion and two vocals? Do you imagine you'll record just a few tracks, with standards effects, such as reverb, delay, & compression?
Lean toward the bare bones recommendations.
- 8Gb RAM (4, but that's stretching it)
- CPU: 1.5GHz, single core (or better)
- Drive Use: 240 - 500Gb internal HDD
Tweak Your Computer Performance For Audio
When you're recording, you'll want to stop background processes that are running on your computer. Software such as anti-virus often runs scans, or send interrupts to you system, on a timed basis. You don't want this to happen while you're in the middle of recording, so turn that stuff off!
I also have a program called Wise Game Booster that clears out any RAM hogs and stops unnecessary processes. I run it before I start recording.
Additionally, you'll want to set up your computer to run audio processes smoothly. But I have a novel approach. Just load up some music software, and start recording. If you don't run into problems, you're good.
If you find yourself having computer performance issues, then do a search for "optimize your ___________ (insert your operating system) for audio" and follow the steps.
Fans (Not That Kind)
Computer fans need to be quiet for home recording. It's often the biggest source of background noise you have to deal with.
- If your fan is causing a problem, you may be able to change the speed. Search for your OS, and "change fan speed".
- Record further away from your computer (you may need a way to trigger your DAW remotely).
- Put something to block the fan sound.
- Noise reduction after the fact.
- Live with it.
My laptop fan can be pretty noisy. If I'm recording video on the computer while I'm recording audio, even more so. But if I'm recording a video tutorial, such as the tutorials I make for this site, I need to be at the laptop while I record.
I take a towel and cover the area near where the fan outputs (be very careful with this as you can overheat your computer). I push the laptop another foot away from me to get the fan more distant, and I sometimes use ReaFIR to do noise reduction after the voiceover is completed.
Another option would be to add a second video monitor, place it some distance from my laptop, and record the tutorials in front of that monitor.
Music Production Hard Drives
Frankly, digital audio files don't take a lot of computer resources to record, or play back. However, they must record and play back without interruption.
I wouldn't recommend recording on a 5400 RPM hard rive, but if that's what you have -- give it a go. Large sample libraries that come with virtual instruments, and your main recording software should live on SSDs, if you have one.
If not, 7200 RPM hard drives will probably cut it.
What you will need is lots of hard drive space. I'd say 250-500Gb is a minimum size for a hard drive to work on your music projects. I have 2, 2TB drives in my system, but I also do a lot of video.
As you finish projects, you can move them to a drive you use for storage. It really doesn't matter what the speed of that drive is.
And puhleeze have at least two backup systems going. At least one online backup and one physical backup. You don't want to lose years of work.
Music Production Software: Your Digital Audio Workstation (DAW)
Back in the day, it was giant tape machines and mixers the size of a small rhino. Now, all that functionality is on what's called a DAW, or digital audio workstation.
It's a recording studio on your computer. Well, most of a recording studio in your computer.
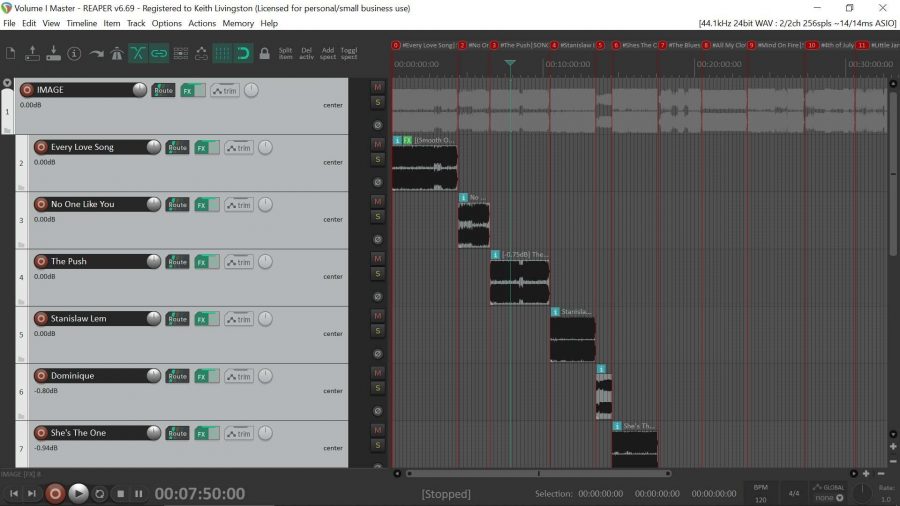
Generally, a DAW has the capabilities to record and play back audio and MIDI tracks, mix them, add effects, and output the music into a finished, stereo audio file. You do the work, the DAW handles the functionality.
Which DAW Should You Choose
Protools is the 800 lb gorilla in the field, as it has a big market share in professional studios. However, it has an expensive upgrade and support plan. Ableton Live is the king in terms of live looping DAWs. But I recommend REAPER for home music production. Reaper is $65 for two full versions (it takes several years to go through two versions). It is incredibly flexible and functional.
REAPER has a free trial period and is fully functional after the trial -- but pay for it :-)
These days, it's easy to transfer audio files between DAWs, so there's little reason to shell out big money for Pro Tools, even if you're going to mix in a pro tools equipped studio.
There is essentially no difference in the sound quality between a thousand dollar audio workstation, Audacity (which is free), or REAPER, which is more appropriate than Audacity for multi-track recording and mixing. There's no need to spend money on Pro Tools, unless it's specifically required for your audio engineering job.
The quality is in the sounds you make, the recording environment, the audio interface, the mics, the processing you use inside the DAW, and your skill. The digital audio workstation is about your workflow.
Plug-Ins For Home Music Production Recording Studios
DAWs often use what's called plug-ins. There are three basic categories.
- Effects (or FX)
- Virtual instruments
- Amp SIMs
Effects: compressors, EQs, reverbs, delays, flanges, choruses, etc.
Virtual Instruments: Virtual drums, basses, guitars, orchestras, synthesizers, percussion, etc.
Some DAWs come with lots of stock plugins. Sometimes you have to find plug-ins from other manufacturers. When figuring out which DAW to use, which stock plugins it comes with is a major consideration.
Amp SIMs: Amp SIMs are designed to emulate guitar and bass amp.
Audio Interfaces
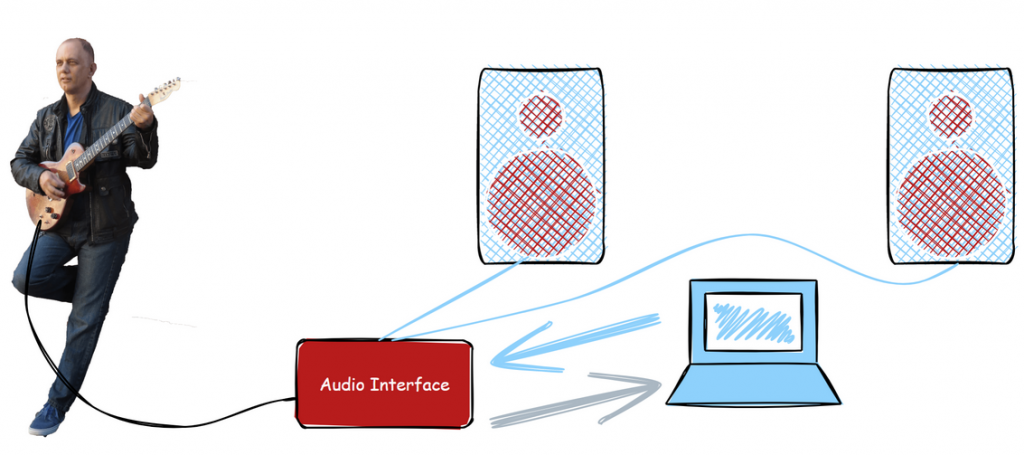
An audio interface is the bridge between your sound source, and your computer. Musical instruments may make acoustic sounds, or create electrical signals. You might plug them into your audio interface in order to turn the analog electrical signals into digital 1s and 0s.
Or, you can slap a microphone in front of a musical instrument and plug the mic into your audio interface. Same thing.
The audio interface has analog to digital and digital to analog converters. In other words, you mic up your kazoo, the microphone turns the audio into an electrical signal. The audio interface helps you set the level, and the A/D converters turn the sound into digital bits your DAW can record.
When your DAW plays the sound back, the DAW sends digital audio back to your audio interface, which converts the computer data back into electrical signals, which drive your speakers or headphones.
- Guitar to audio interface
- Interface turns the analog electrical signal into digital 1s and 0s and sends the data to the computer
- the computer records the data and sends the playback back to the audio interface
- The interface changes the digital info back into analog electrical signals, which get sent to the speakers
Not that you need to know that. You just need to know that audio interfaces are the thingie into which you plug your mics or guitars.
Your audio interface will need at least the number of inputs you'll be recording live at one time. In other words, if it's just you and an acoustic guitar and you're going to overdub vocals, one or two inputs will be enough.
Most audio interfaces have inputs that will accept microphones, or instruments such as guitar. Most will also provide the phantom power needed to power a condenser mic.
Direct monitoring is important for home recording, as it allows you to hear the signal before it hits the computer and therefor has effectively no latency. A loopback feature is useful in you're going to record tutorials or videos.
Here's what you'll be looking for . . .
- Connection Type (USB? Thunderbolt?)
- Number of inputs (needs to be as high as the number of tracks you'll record at one time)
- Direct monitoring (solves a lot of problems related to latency)
- Phantom power (to power condenser microphones)
- Outputs
- Loopback functionality (if you stream)
- MIDI Capability (if you plan to record MIDI)
Even the fairly cheap audio interfaces sound pretty good these days. Here are some recommended audio interfaces at the entry level.
Interface Recommendations
Audio interfaces have come a long way. Even the budget models have decent preamps these days. Focusrite, Presonus, Audient, Steinberg, Behringer, Mackie, SSL, M-Audio, Motu, and Tascam all make reasonable quality interfaces.
Two-Input Budget Interfaces
I'd go with the Audient Evo 4 if you need two mics at once (which you might, even if you're a solo artist, and you want to record an instrument in stereo). If you need more inputs and outputs, move up to the Evo 8. The ID4 is also good, but you'll be limited to one mic and one instrument level input.
I just checked eBay, and saw a few used Evo 4s for $99-$129, if you can't afford a new one. Audient is making really good interfaces right now. Clean, good sounding preamps, low-noise & quality builds.
Microphones
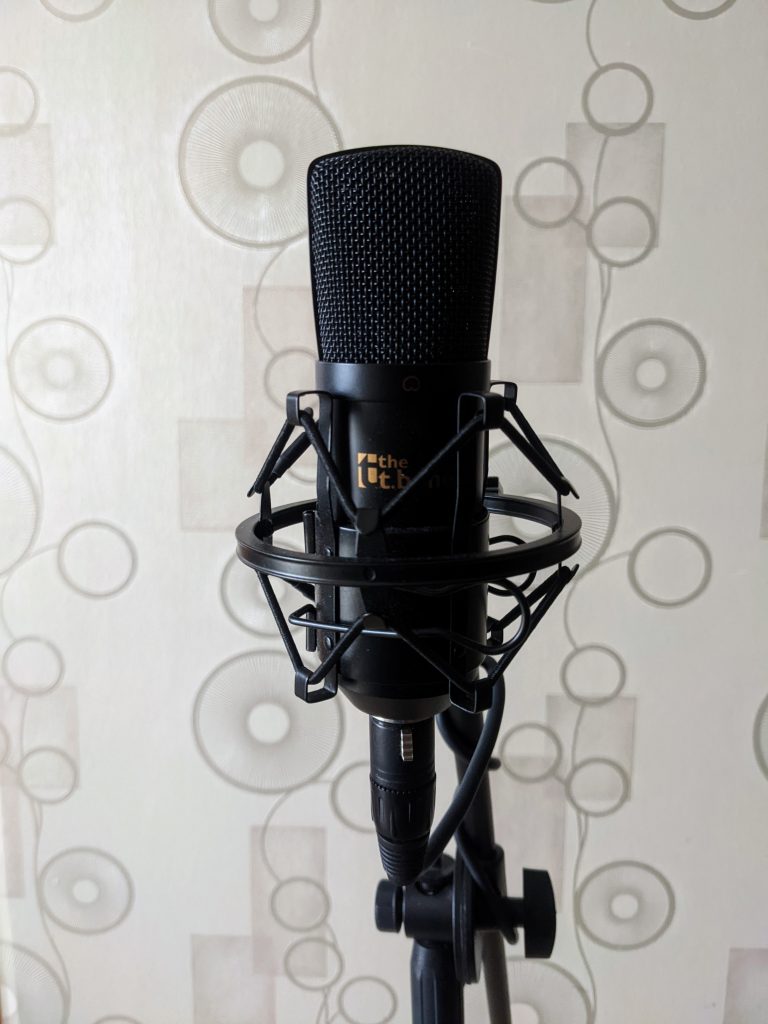
Microphones turn soundwaves into electrical wave forms. If you do any recording of acoustic instruments, you're probably going to need one or more microphones for your home music studio.
The number of mics you'll need is largely determined by how many you'll need at one time.
I do full band-style recordings, often using virtual drums and bass. I can generally get by with one good mic. Two would be better, as I would like to record my acoustic guitar in stereo. I use plugins for piano sounds. But if you have a real, live acoustic piano in your recording space, I'd advise at least two mics. But one is what I have, right now.
Lead vocals are recorded in mono, with just one microphone, the vast majority of the time. If you're doing choral vocals, one microphone probably won't do.
Need to record a drum set? OK, Kick, snare top, snare bottom, rack tom, rack tom, 2, floor tom, and a stereo par of overhead mics. That's 8 mics, right there.
Need to record a duo with vocals, and acoustic guitars live? One mic for each singer and one for each guitar might do it. That's 4 mics.
Guitar amps often use a blend of two mics.
Condenser Mic vs Dynamic Mic
There are several types of microphones; dynamic, condenser, ribbon, and PZM. Condenser and dynamic microphones are the two most common in studios.
Let's cut to the chase on this one. If you're going to get only one microphone, get a large diaphragm condenser mic. Large diaphragm condensers are what's used on vocals most of the time in major studios. Condenser microphones are used for most everything else, except maybe some high volume instruments, such as snare drum.
But if you have an SM-57 (it's a dynamic mic) lying around, use it! Dynamic mics have been used for vocal mics on hit records before.
If you're planning on taking your studio mic down to your local tavern to play in the battle of the bands, consider a dynamic microphone. They're tougher. Condenser microphones are a bit more delicate. On tour, even major acts use mostly dynamic mics.
Prices for good quality condenser mics have fallen drastically from the days when you had to pay thousands for a U-87. Well, you'd still have to pay thousands for a top-of-the-line Neumann, but now it's possible to get a good condenser mic for under $200.
Polar Patterns, Bass Roll-offs, And Pads
Microphones may have various switches on them, including a polar pattern switch, a bass roll-off switch, and a pad.
Polar Patterns
Polar pattern is just a way of describing from which direction a mic picks up sound best. Many condenser microphones have a cardioid polar pattern. Cardioid means heart-shaped. It picks up sound more from the front of the mic that the back. It rejects sound from the back, to some degree. It's not perfect rejection. Cardioid microphones are better at rejecting higher frequencies from the back side, than lower frequencies.
Other polar patterns include omni-directional (you can put the mic at the center of a group of singers standing in a circle), figure-eight (bi-directional), and hyper or super-cardioid with a tighter cardioid pattern.
Most of the time, cardioid is what you need. But a condenser mic with a polar pattern switch is more versatile.
Bass Roll-Off
Bass roll-off is good for vocal mics, as it can decrease the rumble from trucks going by on the steet. It cuts a bit of the low frequencies out of the mic. These are frequencies not typically needed for voice, so you can cut them out. But if you're recording something that needs lots of bass, leave it on.
Pad
A pad decreases the level of the signal coming into the mic; usually by 10-20dB. If you have an extremely loud sound source, a pad can keep the sound from overloading the mic's electronics.
Right now, my one microphone is cardioid only, with no bass roll-off and no pad.
Studio Monitor Speakers
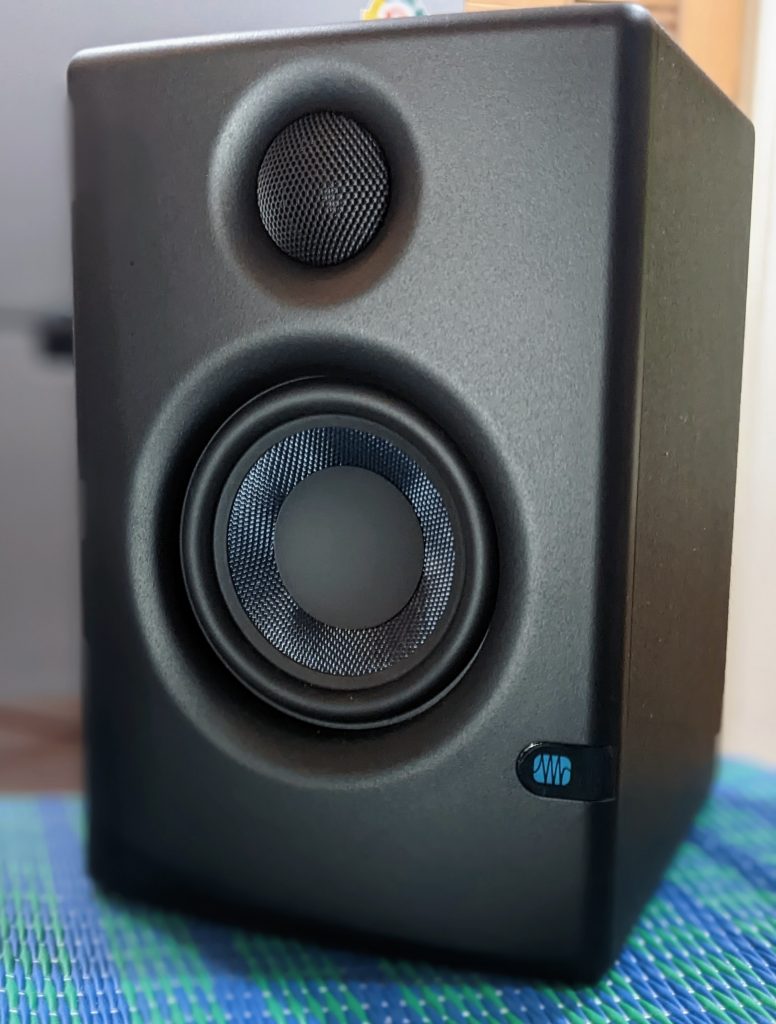
Studio Monitors: Speakers designed for the studio environment.
Studio monitors are different from regular home speakers. Home speakers tend to hype certain frequencies in order to try to make the music sound more exciting. For instance, they may emphasize low frequencies so the music is really thumping.
However, if you create music on speakers with hyped low end, you might not have a much low end as you thought. It will fool you.
So, the object of studio monitor speakers is to give you an accurate representation of what the music really sounds like. Their frequency response should be close to flat. 'Flat' means they don't emphasize any frequencies relative to other frequencies.
Low end is particularly problematic in home studios. Low frequencies are harder for speakers to produce, and harder to hear accurately in rooms without acoustic treatment. Smaller speakers often have a harder time reproducing lower frequencies. Sometimes a sub-woofer is added to cover the lows.
Headphones
Headphones are a good adjunct to studio monitors. Some folks even do all their recording and mixing on headphones. I would recommend good, flat studio headphones to use when you can't use monitors.
I often record late at night, when I can't have music playing out loud. With headphones, I can work on music in my condo at 4 A.M., without disturbing anyone.
The other advantage to studio headphones is that they largely take the problematic room acoustics out of the equation.
Closed-Back Headphones: have the advantage of blocking more sound leakage from the headphones, to you mics. If you're recording vocals, you want to minimize leakage.
Open-Back Headphones: are what I use in my recording studio. They sound less boxy and more natural, and they're easier on the ears if you're wearing them for long periods of time. I keep the volume low when I'm tracking vocals, to minimize leakage.
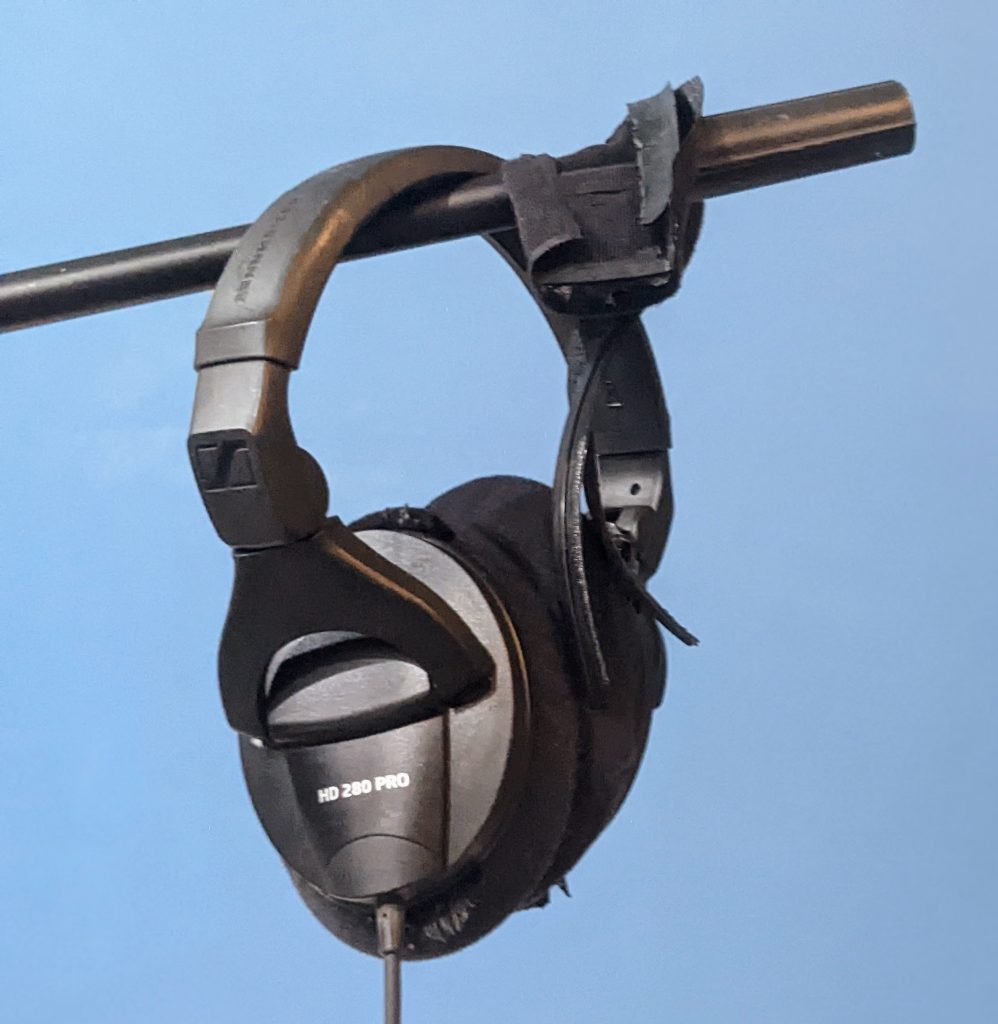
After 6 years of faithful service, the head cushion on my Sennheiser HD 280 Pro Headphones fell off tonight, as I was writing this article. I've replaced the ear pads a couple of times. Do I replace the headphones, or wrap a hand-towel around the head piece like some kind of cheapskate?
About Acoustics
High frequency sounds don't have much energy. They have shorter wavelengths and are easier to absorb, diffuse, or block.
Lower frequency sounds (bass) are more problematic. They have long wavelengths. What stops low end is mass, space, and mass. Unfortunately, lower frequencies is where many of the problems with room acoustics occur.
It's expensive to fix properly.
What does help, besides bass traps? Furniture can help (although couches and mattresses can resonate). Heavy curtains hung a bit from a flat surface such as a wall, or glass will help some, but won't stop really low frequencies, unless they're specially designed for it.
Frankly, this is one of the areas of music production in which you will have trouble competing with the big boys and girls. Professional recording studios often spend a ton of money getting it right.
Do the best you can within your budget, listen to a lot of music on your system, mic your instruments with the mics in close when you can, and you'll do OK. I worked for years in some terribly acoustically warped basement studios.
Acoustic Foam, Absorber Panels And Bass Traps For Acoustic Treatment
Acoustic treatment of a room is a complex subject. The bottom line is that most people think they can treat a room by putting up some acoustic foam panels, or even some egg cartons. Not so.
Let's talk a little about the common misconceptions about acoustic treatment, and what your approach might be.
First of all, what's the purpose of acoustic treatment? It's to make your room as flat as possible, so you can hear the music accurately. Different room sizes, shapes and materials emphasize different frequencies. That means you're not really hearing the music as is.
So, your music might sound good in your home studio, but it might not sound good elsewhere.
So, professional studios spend a lot of money making sure their rooms are acoustically neutral, and isolated from noise sources. For instance, they might have a cement foundation, and above that, rubber pads. Above that, the floor. The rubber pads help isolate the floor from any noise that might travel through the ground, to the cement, and up into the studio.
Professional studios often have double walls between rooms. There is a wall, a space, and then another wall. This helps keep sound from traveling between rooms.
Control rooms often have double-pained, tilted windows. The tilt means there are fewer parallel surfaces in the room. Parallel surfaces create standing waves, which is a fancy-pants way of saying they emphasize certain frequencies relative to other frequencies.
You're probably not going to be able to do many of these things in your cozy basement.
So, what can you do? The room in which you choose to record is probably a box. The floor is parallel to the ceiling, and the walls are parallel to each other. Should you just start putting sound absorbing acoustic panels up in your den? Not exactly.
Here's what I recommend to start with.
- Listen to your room. Walk around, making noise and choose a good sounding position that's practical.
- Set up your studio monitors, and play music with which you're very familiar.
- Frequently compare the music you're recording, to your familiar songs.
- As you get more experience, you'll probably notice problem areas. Measure the room's time/frequency response (described below), and get someone competent in acoustics to help you solve the issue.
Other tips . . .
- Take the word 'soundproofing' out of your vocabulary. It's not going to happen.
- Don't start buying or putting up acoustic panels, unless you're trying to solve a specific problem, and you know the panels will fix the problem.
- Break up parallel surfaces as much as possible. Furniture is a good tool to start with, although you can't put your sofa on the ceiling. Bookcases are helpful, as well.
- Walk around like an idiot, clapping your hands, and sometimes singing. You might find that some spots sound better than others. Maybe you want to place microphones in that spot and see how recording there sounds.
- In general, don't put your speakers against a wall, or in a corner. Baby don't like to be backed into a corner.
- Use headphones a good percentage of the time.
- If you put egg cartons up and I find out, I'll personally travel to your hometown and make fun of you, in front of everyone.
- If you decide to go the acoustic treatment route, start with the area above your listening position, as well as the areas directly in front and in back of your listening position, any parallel surfaces to the sides, and the room's corners.
Measuring A Room's Acoustics
If you do decide to work with room acoustics, you can measure the frequency response at your listening position. Generally, how this is done is to put a flat microphone where your head would be, and play some white or pink noise through your speakers. Then you can see (on a frequency analyzer), which frequencies are turned up, and which are turned down.
If you have a problem with certain frequencies being emphasized, you can acoustically treat the room to help. There are tunable bass traps, for instance, that you can use to help eliminate standing waves.
As a last resort, you can put an EQ on your speakers, as opposed to your music. You use this equalizer to adjust for the frequencies the room changes. But this is not ideal.
I haven't done it myself, but I really like this technique for finding optimal listening position.
To Acoustically Treat Your Room
In general, here's how you'll start with room treatment.
Bass traps will go in corners that extend from floor to ceiling. Walls to your side may require absorbers to lessen reflections. You can use absorption or diffusion on the wall behind the listening position.
I really think the diffusors that are made from different lengths of wood blocks look great.
The ceiling above your head at the listening position can be a problem area. Absorbers may be required there. You want to break up those parallel surfaces.
Mic Stands, Cables, Adapters, And Miscellaneous Studio Accessories
You'll need various accessories. Buy two of everything, unless it's expensive. You don't want to have to delay a recording session for a $2.59 adapter. I prefer triangular mic stands as I think they're more stable. and they store with a smaller footprint. Get stands with booms.
Items you might need, but might not think about
- Power conditioner ( you don't want to fry that computer during a voltage spike)
- Mood lighting (it helps to set the, erm, mood when recording)
- Direct box (sometimes plug in instruments such as guitar and bass work better through a direct box, than an audio interface. Try your interface first, though.)
- Monitor isolation pads and stands. These decouple your speakers from the surface upon which they sit. If your monitors are sitting on a resonate surface, this may help. Get the tweeters up to ear level.
- Furniture that doesn't squeak. If you're going to sit down when recording, your furniture can't make noise.
- Guitar stands.
- Cable ties and cable organizers.
- Storage space for gear while you're not using it.
Pop Filters & Shock Mounts
Remember to pick up a pop filter to go in front of your microphone when you sing. It helps reduce plosives (the rush of air when you vocalize a "p", or a "b"). Plosives sound like a big thump in the recording.
DIY Vocal Booths & Reflection Filters
A vocal booth is a form of isolation. Sometimes it's called an isolation booth. An isolation booth can also be used to record other instruments, such as acoustic guitar. It has two purposes.
- To isolate vocals from other instruments that are playing live, or from noise.
- To provide a reasonable acoustic environment in which to record vocals.
In a home studio, a vocal booth might serve a third purpose. It might allow you to record without disturbing others in the house, or building. It's not going to eliminate the sound, however.
Let's look at those individually.
Isolate vocals: If you're not tracking vocals at the same time as other instruments, you probably don't need a vocal booth, unless you have a noisy or bad sounding environment.
Sound: Every room has a characteristic sound. A vocal booth attempts to reduce the influence of the room -- making it sound more neutral, so the character can be decided later in the recording and mixing process.
Isolation booths are typically covered with acoustic panels, in order to reduce the sounds bouncing off the walls. These sound reflections can color the sound in unpleasant ways, by causing early reflections, standing waves and comb filtering.
If your room sounds good, you might not need a vocal booth.
Disturbing others: Unless you're going to spend a ton of money, isolation booths won't completely isolate the inside of the booth from sounds on the outside, nor will they eliminate someone hearing your squawking on the outside. But they can reduce the sound levels.
Most of the home recording isolation booths for sale, won't do much in this regard.
Blanket Forts
I have, on occasion rigged up some PVC pipe into a large phone booth shape, and hung heavy blankets, in order to get a better vocal sound. There are a couple of things to remember when doing this.
It takes mass and space to stop problematic low frequencies. A heavy blanket, a bit of space, and another heavy blanket helps. It won't block the low lows, but you can generally reduce some of the lows with EQ, without harming the sound.
And, the walls are not the only parallel surfaces to contend with. The floor and ceiling are likely also parallel, and bad for creating unwanted reflections. What are you going to do about them? You can hang a blanket on top of your contraption, and put some carpet under your feet, as a minimum.
Here's a video from a few years back in which I actually tested the effect of a completely unprofessional vocal booth. Superheroes helped.
More About Room Acoustics
Sound bounces around your studio. Why is sound bouncing around a problem? Two reasons.
- Audio smear
- Reverberation
- Nodes
OK, that's three reasons.
Audio Smear
Audio travels a little over a foot in one millisecond. It's about 3 thousandths of a second per meter. That means, if you're recording voice, and you've got a ceiling one meter above your head, sound hits it and bounces back into your microphone in .006 seconds. From the floor back up to your mic, probably about .01 seconds. A bit longer time from the walls and objects in your room.
So, what you have is a bunch of reflections, hitting your mic at different times, from .006 on up. These early reflections are too quick to hear as separate repetitions. In fact, they can be difficult to hear at all. But what they do is smear the sound of the vocal across time a little bit.
It makes the voice sound less distinct.
So, when you mix, if you have trouble getting the vocals to sit well with the other instruments, and be heard clearly, early reflections may be to blame.
Reverberation
We use reverb to make things sound further away and to add some mystery and 3-dimensional space to sound. So, why is reverb from sound bouncing around in your home studio a bad thing?
Well, it takes away our choice. We don't get to decide what kind of reverb we want on the voice -- the room dictates it to us.
Also, the room determines the tone of the reverb, so we have little choice about the tone. If we try to EQ the reverb, we EQ the voice, too. If we add a reverb with an effect, we can control the tone.
Nodes
Your room is going to emphasize certain frequencies, and de-emphasize other frequencies, based on the dimensions and amount of reflective surfaces in the room.
This creates nodes. Nodes are just a way of saying that resonances will occur at certain frequencies, over time. The 'over time' part is important because it means those frequencies will ring longer. The nodes can't be eliminated with EQ, because you're trying to solve a time problem with a volume solution.
In other words, the resonances are louder than their neighboring frequencies, because they build up over time. You can turn those frequencies down, but they'll still ring longer. EQ is an imperfect solution to room nodes.
Reflection Filters
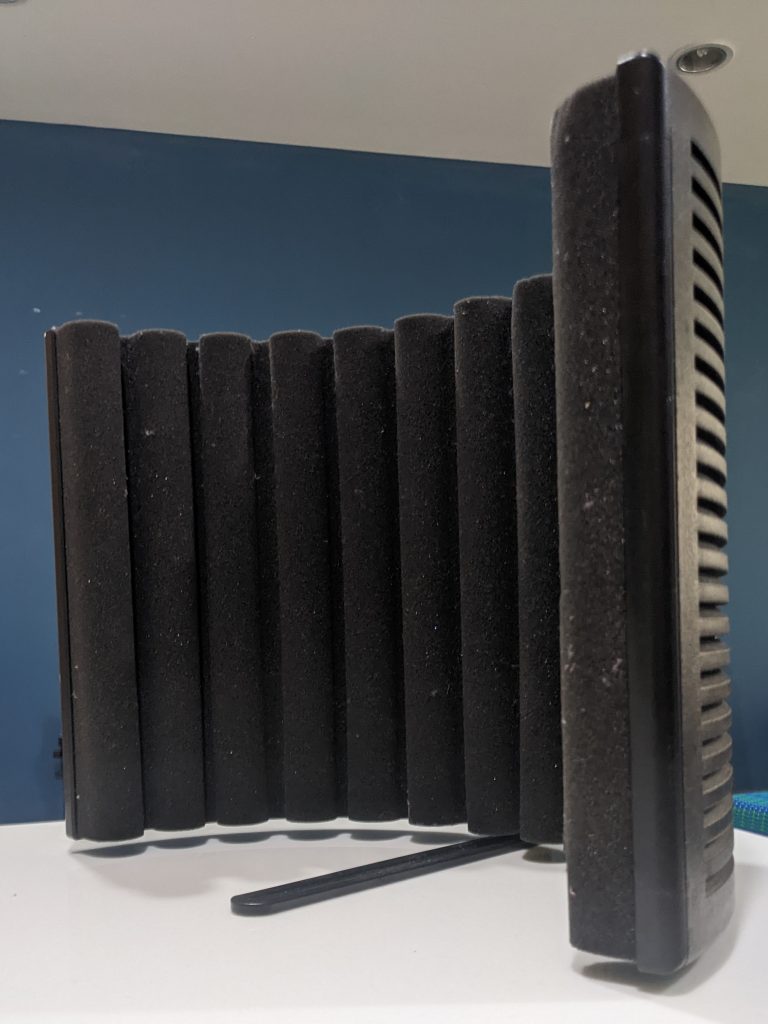
Reflection filters can minimize these early reflections, reverberation, and room nodes, by reducing the amount of sound that goes out, away from the mic, and to some extent blocking some of the sound that bounces back.
The best reflection filters, such as the Aston Halo, block some sound from reaching the floor and ceiling, as well as the walls to the back and sides of the mic.
I actually ordered an Aston Halo from a local supplier (I'm in southeast Asia), but the supplier flaked and it never came (I got my money back). I tried one in a music store once, but it was not an ideal environment in which I could test. But the approach makes sense.
Frankly, I don't like the idea of singing with something like this in my face. It doesn't help the mood.
Except for the $1,000 models that are basically a vocal booth on your mic stand, reflection filters don't stop reflections from the front side of the mic, but your bulbous head takes care of some of that.
DIY Mini Isolation Booths
At one point, I built a tiny booth out of a canvas craft box, and some acoustic foam. I've got to say I didn't care for the way it sounded, but you can give it a try, if you like.
Deverb Plugins
There are plug-ins on the market that help reduce the room sound. I have SPL De-Verb Plus, which works reasonably well. I tried bunch of them, and it was the best in terms of cost, balanced with how well it worked.
My Philosophy On Isolation Booths, Reflection Filters & Deverb Plugins
The point of all these things is to lessen any problems created by room reflections, and to give you more choice, later in the mixing process. If you've got a bunch a reverb from your room sound, you have less choice as to your reverb sound later.
With reverb effects, we can put a voice into any size room we want to. If the room reverb is already there in the recording, we're stuck with it (except for the amount a de-verberation plug-in could remove).
However, having choices removed is not the worst thing in the world. If you can find a good sounding spot in your room, it will sound good in the recording, too. You won't be able to change it as much, but it will still sound good.
And you have to balance that with how much trouble your solution is. As I mentioned, I built a DIY blanket fort, vocal booth out of PVC pipes and blankets. But I had to walk around it to get to my kitchen. And it took 10-15 minutes to set up every time.
I don't know about you, but when I want to cut vocals, I don't want to stop and build something.
So, eventually I stopped using it. It was impractical.
Deverb plug-ins always degrade the sound to some extent. Does it help, or hurt? That's your call. But I've largely stopped using any treatment or plugin to remove room sound. I just deal with it best I can, in the mix.
The best solution is to minimize the problems by acoustically treating your room.
Studio Chair
A studio chair is an often overlooked, but important piece of equipment in your studio. You're going to be sitting in it for hours, so choose carefully. Adjustable height is important, and of course, comfort. I find a gaming chair works well. Those cats sit in a chair for hours in front of a computer, just like we do.
If you're going to play guitar or bass sitting down, make sure the chair has arms you can move out of the way.. or keep a stool nearby.
Studio Desk Or Table
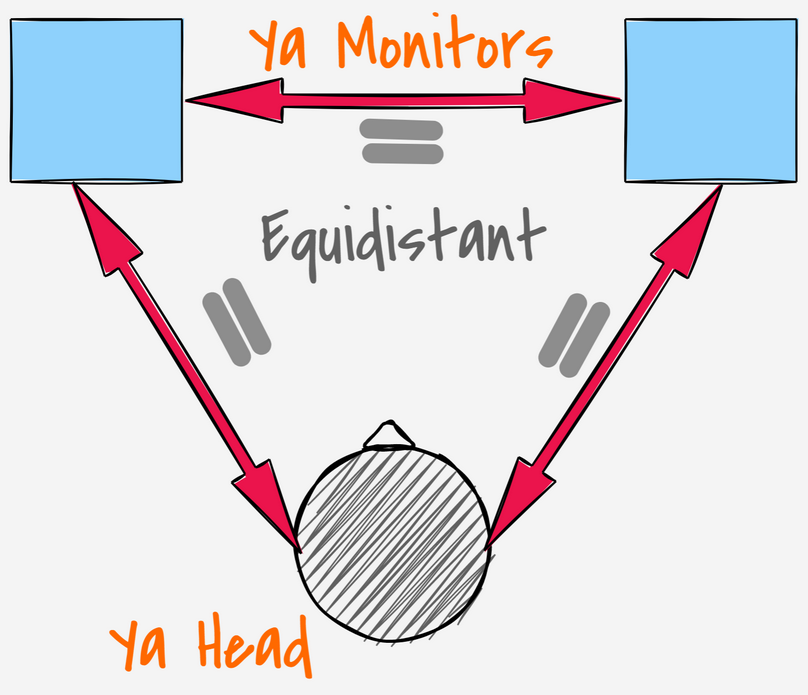
The ideal speaker placement is that the speakers and your head position form an equilateral triangle. In other words, the speakers are as wide apart as they are far from you.
So, make sure whatever studio desk or table you use is big enough to accommodate the speaker spread, as well as your audio interface, and whatever else you need up there.
Other than that, if the height of the chair is right, you're good.
Acoustic & Electric Instruments
You probably already have these laying around, but you might want to pick up a bass guitar (or virtual bass), a drum set (or virtual drums), or whatever instruments you don't have access to.
MIDI Keyboards
Many synthesizers are available via plug-in. In that sense, there's no need for a physical keyboard. However, you might want to play MIDI notes into your recording, rather than programming them in. In this case, you'll need a MIDI keyboard. Most modern MIDI keyboards have USB connections, but if not, you'll need a MIDI interface.
Alternately, you can use your computer keyboard (that thing you use for typing) to input MIDI. That might work for something such as playing in drum patterns, but if you're going to do melodic or chordal input, get a MIDI keyboard.
MIDI Controllers
MIDI controllers are devices that can send MIDI information to your DAW. Some MIDI controllers have keyboards for playing notes. Some have faders (volume sliders), which you can map to your DAW, and use to mix with your fingers rather than your mouse. Some MIDI controllers have lots of buttons. You can create shortcut keys from the buttons to your DAW functions and operate the DAW via your MIDI controller buttons.
Home Studio Design
If you're just starting out, and you want to set up a studio, I'm going to give you some advice about home studio design you probably won't hear anyplace else.
Don't design. That's right. You heard me. Don't design your home studio. Do some minimal sound treatment, but don't go nuts. Here's why.
First of all, you don't know what problems you're going to run into, until you do some recording. You might spend a lot of time and money designing a desk that fits perfectly in a corner of your room, only to find out it's not a good spot to put your monitors.
As I mentioned before, I wouldn't do much in the way of acoustic treatment, unless you have a specific problem you've measured, and you know the treatment will solve that problem.
So, what do I advise?
Get your basic gear -- an audio interface, monitors, headphones, a microphone, stands, cables etc., and start listening to music on your studio system. Get used to how it sounds. Then start recording. If you run into something that doesn't sound good, then start problem solving.
What would I consider in terms of acoustic treatment right off the bat? The ceiling over you listening position and the wall behind your listening position are good spots to start. Absorption on the ceiling. Diffusion or absorption on the back wall. Going at it willy-nilly without measuring the room acoustics and solving specific problems with specifically tuned solutions is haphazard.
But, it's hard to go wrong with diffusion on important parallel surfaces.
I do think it's a good idea to put some thought into what you'll be recording with a mic. As for me, I only record vocals and acoustic guitar in a room. I plug electric guitar into my audio interface and use guitar amp SIMs for the sound. The rest of my sounds come from virtual instruments, or from tracks recorded by friends in other places.
Mic And Instrument Placement
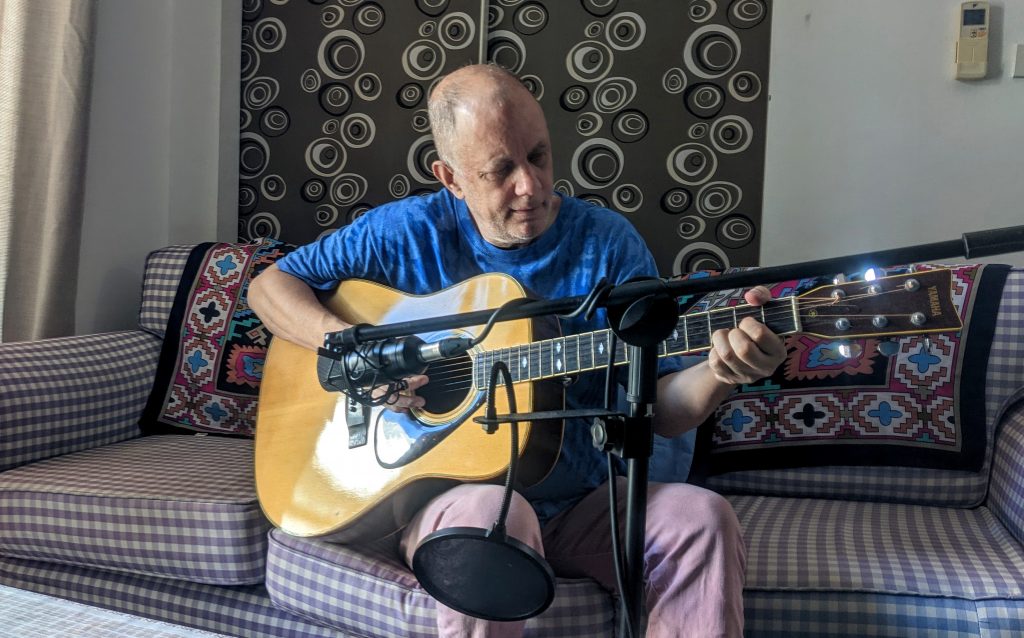
In terms of placement, I record acoustic while I sit on the couch, with my lone mic about a foot from where the neck meets the body of the guitar. As ugly as the couch is, it absorbs a fair amount of the ambient acoustics. The other side of the room has a shelf, and various other items that help break up the sound. It works.
For vocals, honestly, I usually record them sitting in front of my computer. It's not ideal acoustically, but it works best for my work flow.
Another option would be to find a dedicated spot in the room that sounds best, and take a controller with me that will put the DAW in record, delete bad takes, etc. I can do that with my phone or iPad set up on a stand near the mic, but again, the longer it takes to set up, the less likely I am to do it.
It could be a walk in closet filled with clothes, or a separate room that just sounds better than your main room.
In terms of vocals, you can walk around any room, singing in various places, and then trying different microphone placements and distances. For the mic I have, I find the voice sounds best maybe 12-18 inches away from my face, and with the mic tilted slightly downward.
However, in order to take some of the room out of the sound, I usually get closer to the mic than that. Because of the way cardioid mics respond to different differences, this adds some bass frequencies to my voice, but I can EQ them out later. These are the trade-offs you make in a less-than-perfect recording environment.
Listening Position
Probably the most important thing in terms of room acoustics and your recording studio setup, is the listening position. As a general rule, you'll want the listening position to be equal distances from side walls, and near one end of the room, length-wise.
Home Studio Equipment Budget
Let's put it together. Here's the studio gear you'll need for music production.
- Computer (You probably already have this.)
- DAW ($65 for REAPER).
- Microphone ($150)
- Audio Interface ($200)
- Virtual instruments ($350)
- FX (REAPER Includes most of what you'll need)
- Mic stands, cables, adaptors, misc. ($200).
There you have a basic home music studio for under $1000. Your needs may vary, of course.
Home Music Studio -- Big Picture
That's the overview of what goes into home music production for independent artists, and what it takes to put together your studio setup.
Let's talk about how to add song titles, artist names, album titles, ISRC codes ...
What Does Your Reaper License Cover?Your Reaper license is a perpetual, one-time purchase. You ...
Let's suppose you want to see the frequency content of your bass guitar compared ...
Reference Tracks & Mixes: What Are They?Reference mixes are good sounding, professionally recorded, mixed ...
Latency (the time between when a signal enters a system, and when it exits), ...
Reaper Setup: Key TakeawaysDownload the driver for your interface from the manufacturer's web site, ...
Key TakeawayLet's say you have 3 plugins you want to add to several tracks. ...
EQing Vocals: IntroductionAchieving a balanced and clear vocal sound is a hallmark of professional-sounding ...
